
Working with Tables
Tables should only be used for presenting data to your website visitors. Never use a table simply to control layout and design elements of a web page.
Accessibility
- Include a table caption to explain the table's purpose (not required, but is good practice).
- For searchable/sortable tables, include info on how to filter or search.
- Every table must have either a Header Row (most common) or a Header Column. Some longer tables may use both for clarity.
- Keep tables simple by using a single row for column headings. Use regular content page headings above a table if needed.
- Don't add "bold" or headings styles inside the table headers.
For tables that have too many columns to fit on the screen, the additional columns will be automatically hidden on the device screen but will open when the plus icon is clicked:
Create a Table
Open the dropdown menu next to the Table icon in the text editor and highlight the number of cells that you want (by rows and columns).
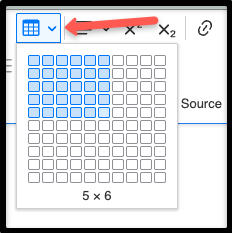
The editor will then display an empty table. Select a cell to add data. Selecting a cell will also display the table options toolbar.
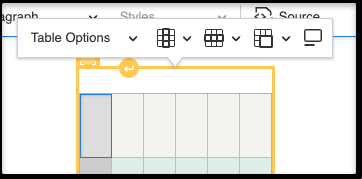
- Table Options: allows you to update the style on the table.
- Columns: add or delete columns or choose a header column.
- Rows: add or delete a row or choose a header row.
- Caption - while not every table needs to have a caption, it acts as a short description of what data the table contains.
Special Formatting
If you want to use a checkmark to mark something: You can simply copy and paste the checkmark into the editor. ✓
View supported HTML checkmarks
To format blank spaces appropriately for screenreaders: using the Source editor, you can put <span class="visually-hidden">None</span> in place of all of the in the empty cells. You can replace “None” with whatever text you want in there. Ex: no, no data, empty, etc.
Add Table Options
Select any cell in the table to open the Table Editing Toolbar

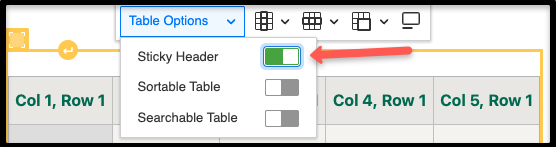
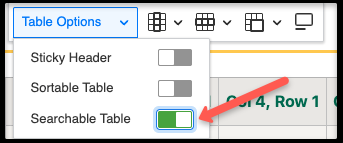
Open the dropdown menu next to Table Options and choose Sticky Header, Sortable Table, and/or Searchable Table. Note: You must have the Header Row applied before you can select a table style.

Create Sticky Header
A sticky header means that if a user scrolls down through the table rows, the column headings will stay in the display window view.
Sticky Header Example

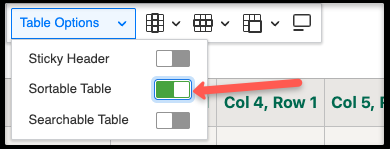
Create Sortable Table
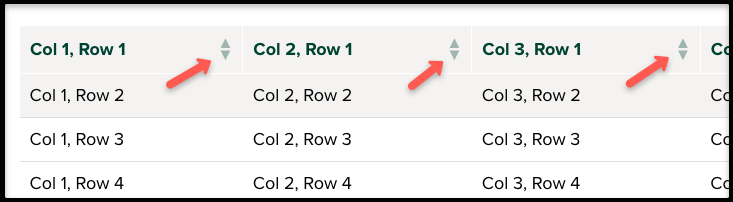
This style allows the user to sort the table by column headings.
Sortable Table Example
Create Searchable Table
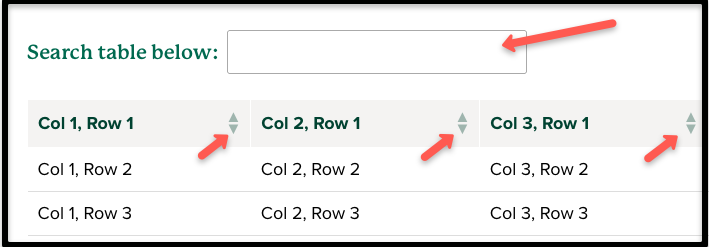
This style allows the table to be searched by any data in the table. The columns will also be sortable.
Searchable Table Example
Copying Content from Excel Spreadsheets
- For this process to work, you must have the empty rows already available in the table in the text editor in Drupal.
- Highlight all of the cells in your spreadsheet and press Command C (Mac) or Ctrl C (Windows) to copy them.
- In your Web CMS content editor, highlight all the cells where want the data to appear and press Command V (Mac) or Ctrl V (Windows) to paste all the cells from the spreadsheet.
- This only works if the exact number of cells are highlighted for the paste function.