Search within:

Ticketing FAQs

These questions were submitted during the ticketing training and initial launch.

Accessing TeamDynamix

How do I access TeamDynamix?

You can access TeamDynamix in multiple places. Campus users will always access the Technology Help Center through help.ohio.edu.

If you are logged into the Technology Help Center, you can click on your name in the upper right corner to open a drop-down menu and access TDNext, which is used for technicians to create and work on tickets:

Shows a dropdown menu with TDNext circled in red.

To access TDNext directly, visit help.ohio.edu/TDNext.

What do end users need to know to submit a ticket?

The process for submitting a ticket for campus users is very straightforward. In addition to the traditional means of contacting the Service Desk through phone, email, chat or in-person, users can now also submit a web form by visiting help.ohio.edu and clicking on +Create a ticket. There is only one form they can complete, which will be sent to the service desk to triage and add a workflow if needed. Users will receive email notifications when tickets are updated, and they can also track their tickets by visiting help.ohio.edu and clicking on View my tickets.

Ticket Forms and Fields

Is there a way to see all field options for a dropdown menu?

Several fields have a magnifying glass that allow you to look up all available options. You can also start typing any part of the word you are looking for to narrow your search more quickly.

Is there a way to move the Save button to the bottom of the ticket?

We are not able to move the save button. However, the save button is frozen to the top of the browser window and always visible, with no scrolling required.

Is location a requirement, or is it auto-filled?

It is not auto-filled, but it is also not a required field for most tickets. For tickets where it is important to know the location to resolve the issue, it is a required field.

Can the location fields include the campus to help narrow the search for building and room?

The location fields use source data from WebTMA. Unfortunately, the Location and Room fields are fixed features of TeamDynamix and cannot have dependencies tied to them. 

How were form names and groups determined?

Form names were approved by the Service Owners and are based on the Service Offering/Tool related to the Service. Service Owners were also consulted on group assignments and workflow. Additional groups can be assigned to tickets by submitting a service request using the (Ticketing Portal) TeamDynamix/TDX form.

Managing and Updating Tickets

How do I find tickets that are assigned to me or my group?

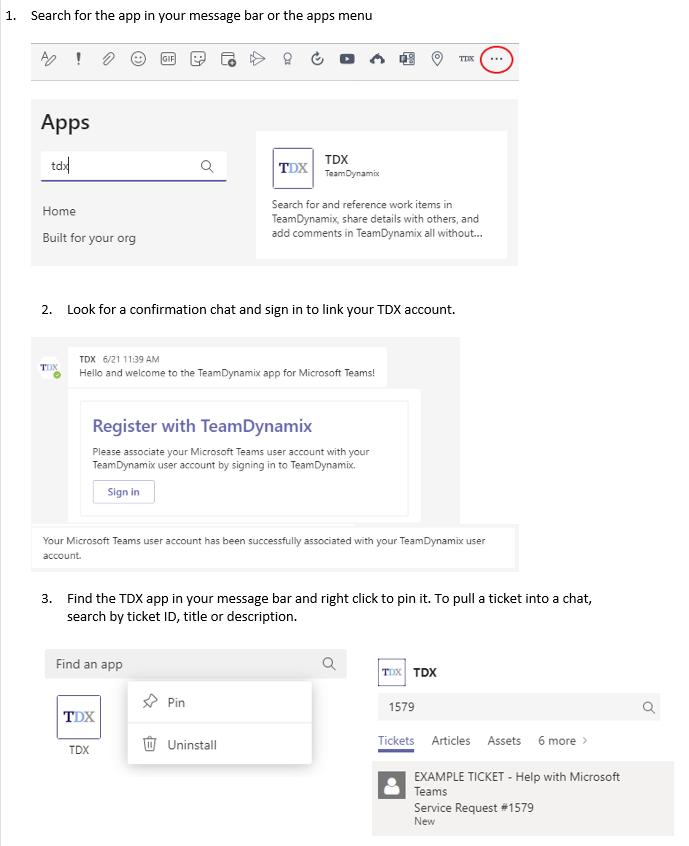
There are multiple ways to find tickets in TeamDynamix, including through the Ticketing Application menu, ticketing filters, ticketing reports, and My Work Application:

Ticketing Application Menu:

Assigned To Me Shows all tickets with status class of “New,” “In Process,” or “On Hold” that the authenticated user is responsible for.  
Note: This shows tickets assigned to you, not tickets assigned to groups in which you are a member. 
Awaiting My Review Shows all tickets with status class of “New,” “In Process,” or “On Hold” that the authenticated user is the reviewer for.  
Note: This shows tickets both assigned to you and to groups in which you are a member. 
Awaiting My Approval Shows all tickets with status class of “New,” “In Process,” or “On Hold” that are in a workflow and the current workflow step requires approval from the authenticated user. 
Awaiting Approval Shows all tickets with status class of “New,” “In Process,” or “On hold” that are in a workflow waiting on approval. 

Ticketing Application Filters:

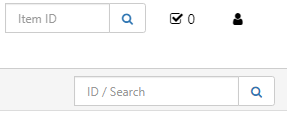
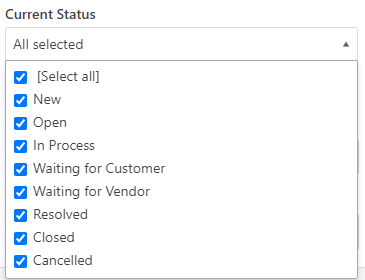
For any item under “Tickets,” you can use the green filter icon in the upper-right corner to search by multiple attributes, including responsibility.

Green filter button

Once you’ve chosen the filter criteria, click “Apply” at the top of the filter menu.

A green apply button with a magnifying glass icon

This search can be saved and run later by selecting the “My Saved Searches” button.

A menu of green buttons: Actions, Refresh, My Saved Searches, Save Search, and To Excel

Ticketing Reports:

You can also create a custom report for tickets assigned to you or various other attributes. Click +Report at the top of the Ticketing Application menu to create a new report. Watch Creating a ticket report for a tutorial.

My Work Application:

The My Work Application helps you manage the tickets assigned to you with the following fields:

My Approvals  You can see tickets awaiting your approval (either individually or on behalf of a group) in the My Approvals section of the My Work Application. For a ticket to appear in My Approvals, it must have workflow assigned. My Approvals means there is a pending workflow step for you or your group to act upon, such as escalating to another team, approving, or resolving the ticket.
My Assignments Whenever someone puts your name on a task or other unit of work in TeamDynamix, that work will show up in “My Assignments.” Note that "On Hold" statuses such as Waiting for Customer and Waiting for Vendor will not appear in My Assignments. We recommend adding a date in the "Goes Off Hold" field so that the ticket will reappear in your My Assignments queue.
My Work Things only show up here if you have explicitly indicated that you are working on them by clicking “Add to My Work” from within the My Assignments section. You can also send work back to “My Assignments” if necessary.

For a tutorial, watch the Using the My Work Application video.

How do I manage the tickets assigned to me?

While you can find tickets assigned to you in the ticketing application, the My Work application makes it easier to manage your tickets and other tasks assigned to you. Click on the waffle menu and then My Work to open the application for the first time. Within the My Work application, you can see all of your assigned tickets and approvals, add them to your My Work queue, and sort them by priority. If a ticket is assigned to your team, you can claim it by clicking the green Actions menu and selecting Take Incident or Take Service Request.

Within the ticket application, you can also sort and filter tickets using the green filter button in the upper right-hand corner of the screen whenever a list of tickets is displayed. Within a ticket, you can also add an assigned ticket to your queue under the actions menu by choosing Add to My Work.

What tickets appear in My Approvals?

You can see tickets awaiting your approval (either individually or on behalf of a group) in the My Approvals section of the My Work application. For a ticket to appear in My Approvals, it must have workflow assigned. Approvals means there is a pending workflow step for you or your group to act upon, such as escalating to another team, approving, or resolving the ticket.

How can I edit my desktop?

TeamDynamix allows you to create multiple desktops in the global (main) desktop space and a single desktop within each application. OIT is developing a default desktop for the global space that can be used to post announcements and other important information. Please do not edit or delete this desktop, but you are welcome to create any additional desktops for your own personal use.

How should I manage tasks?

A task can be anything that the Responsible party for a ticket needs assistance with, including but not limited to reviewing a ticket, deleting an item, or creating a snapshot. Tasks can also be used to make a checklist for yourself in order to complete a ticket. You can assign them to yourself as a reminder of what still needs to be completed.

If you've been assigned a task on a ticket, your responsibility is for that task, and the person or group assigned as Responsible for the ticket still works the ticket. Once you've completed the task, you can just update the task.

For more information, watch the Working with Ticket Tasks video.

How do I complete ticket tasks?

By design, TeamDynamix allows users to resolve and close tickets that still have open tasks. Use the following guidance when working with ticket tasks: 

  • If you are assigned a task, make sure to mark only your task complete, and not the entire ticket. 
  • Don't mark tasks complete that are assigned to someone else.  
  • Don't move tickets to Resolved until open tasks are assessed. Check with the person or team(s) with open tasks to assess their status. If you are unsure about task status, leave the ticket open.  
  • You can create an alert to receive an email once all tasks are completed. Open the My Alerts tab on the ticket, then click the green +Add button and select the “All Tasks Complete” alert. 
  • Resolving a ticket while some tasks remain open should only be done when the associated task is tangential to the overall ticket, and if the task assignee agrees the ticket can be completed. 
Can I update tickets directly from an email?

The ticket feed can be updated from an email reply and will generate a new comment, or you can click a link from the email to open the ticket.

TeamDynamix does not support @mentioning someone via email or updating attributes or fields via email. Email monitor rules can be set up to search for keywords in the subject or body of an email, so you can still create tickets using automation rules and workflow from an email.

Can I update tickets directly from Teams?

First you will need to add the TDX app to Teams. You can do this by commenting on a ticket someone else has posted in a chat, or clicking on the three dots under your message bar in Teams to search for the TDX app. You will receive a confirmation chat from the TDX app that prompts you to sign in and associate your Teams account with your TDX account. You may want to pin the TDX app to your Teams message bar for easy access (right-click on the icon in your app search and select "pin.")

After adding the TDX app to Teams, tickets can be pulled into Teams chats or public channels using the TDX app. Search by ticket ID, title, or description to pull it into a chat. It will display the basic information and buttons that allow anyone in the chat to comment on the ticket directly, or click View to open the full ticket. Note that Microsoft does not support apps in private channels at this time.

Screenshots of the process to add the Teams TDX app described above

How do I attach files to a ticket and/or a task?

Files can be attached under the general category during ticket creation, or added using the Actions > Update screen. Tasks do not allow an attachment and should be added to the ticket.

How can I add links, bullets or other elements to improve accessibility to tickets?

At this time, TeamDynamix does not offer a rich text editor within ticket comments and descriptions. However, plain text can still be used to make help documentation accessible. For example, spell out the steps instead of creating a bulleted list:

Step 1: Do this.
Step 2: Then do this.

Links will appear as plain text, but they will still resolve.

Screenshots can be added as attachments.

Once knowledge management is implemented, agents will be able to attach knowledge base articles, which offer more formatting options.
 

How do I search for a ticket without the ticket number?

The ticketing application has two different search bars in the upper right corner. The Item ID can be used to find tickets by the Ticket ID or Task ID only. The ID/Search bar can be used to search open tickets by Ticket ID, requestor, or part of the title or description in quotation marks; however the ID/Search bar cannot be used to search by Task ID.

Shows two search bars, one reading Item ID and the other reading ID/Search

When your search term contains a number other than a Ticket or Task ID, use the Text Search field, visible by clicking on the green filter button. A combination of numbers and letters, such as SR-12345, requires quotations, such as "SR-12345." TeamDynamix has listed search improvements high on their list of planned improvements.

Green filter button

A search bar with the words Text Search listed above

If the ticket you are searching for is in a Resolved, Closed, or Cancelled status, click on the green filter button directly below the ID/Search bar and apply all statuses.

Green filter button

A dropdown menu showing the following checked: Select All, New, Open, In Process, Waiting for Customer, Waiting for Vendor, Resolved, Closed, Cancelled

How can I see tickets in the HCOM ticketing application?

Only HCOM technicians and TeamDynamix administrators have access to see tickets in the HCOM application. If you need to move a ticket to HCOM, remove the workflow and route it to the Service Desk, which has the ability to move tickets to their application.

Requestors and Notifications

How can I add additional people to receive notifications?

The requestor is the only person who will receive notifications for public comments automatically. If you submit a ticket on behalf of another person, make sure the requestor is the person who should receive updates about the ticket.

To add additional recipients to notifications, add them to the “Notify Other People” field. Note that you may need to do this with each update.

A screenshot of the TeamDynamix update screen with a comment box and two fields underneath that say "Notify" and "Notify Other People"

If you want to notify everyone associated with the ticket, including technicians, click on the blue people icon to add all of their names to the “Notify” field.

A field that says "Notify Other People" with a red circle around the blue icon of three people
Can I "watch" tickets where I am not the requestor?

Yes, TeamDynamix allows TDNext users to flag tickets or create alerts to track tickets where you are not the requestor.

Tickets can be flagged under the action menu within the ticket, and they will appear under “My Flagged Tickets” on the default desktop.

A menu of options under the Action menu, with Flag circled in red
A box that reads "My Flagged TIckets" and a ticket that lists the ID, Title, Modified Date and Status of a sample ticket

To create an alert, click on the My Alerts tab within a ticket, then click +Add. This will bring up a popup menu where you can select an alert when the ticket is in process, due, overdue, or complete, as well as an alert when all tasks associated with the ticket are complete. You will receive these alerts as an email.

A menu with My Alerts highlight, with a green button that reads +Add, then a popup menu below that lists the following options: All Tasks Complete, Ticket is Completed, Ticket is Due, Ticket is Overdue, Ticket is in Process
How can I add a non-OHIO person as the requestor or under "Additional People to Notify?"

The Service Desk will have this capability, using the (plus) button next to requestor. Campus users will not be able to add non-OHIO people through the client hub; they should include any additional contact information in the description field.

TDNext users can include extra contacts outside of the system when updating a ticket. Add any additional contacts to the Other Email Addresses field.

If the requestor is an external contact, please alert the service desk through the contact center channel in Teams or call 740-593-1222 and they can quickly get the user added so you can enter the ticket. They will need to know the following:
First Name     
Last Name 
Primary Email
Alert / Notification Email – Same as above. Can be changed to a user’s personal email address if they would prefer.

The ability to add additional users has been limited to the service desk at this time to reduce the incidence of duplicate accounts.

Campus users will not be able to add non-OHIO people through the client hub; they should include any additional contact information in the description field.

How do I add an external contact to email notifications?

When you choose Actions > Update, you will have the option to add external email addresses in the "Other Email Addresses" field. You will need to add the external email address to the update each time you want to send an email notification.

Shows three fields: Notify, Notify Other People, and Other Email Addresses, with the cursor in the third field

When an external user replies to the ticket from an external email address, the reply will update the ticket with a comment and change the ticket status from Waiting for Customer/Vendor to the previous ticket status.

How can I add a retiree or emeriti as a requestor?

Emeriti are still considered employees and have access to University resources, including provisioned accounts that can be associated with tickets. Retirees do not have provisioned accounts, but can be added by the service desk as a requestor. Ohio University should be used as the Acct/Dept for retirees. The classification of emeriti and retiree is assigned by HR and the Emeriti association.

The ability to add additional users has been limited to the service desk at this time to reduce the incidence of duplicate accounts. If you are working with a user without a provisioned account in TDX, please alert the service desk through the contact center channel in Teams or call 740-593-1222 and they can quickly get the user added so you can enter the ticket. They will need to know the following:
First Name     
Last Name 
Primary Email (@ohio.edu email address, if they have one)
Alert / Notification Email – Same as above. Can be changed to a user’s personal email address if they would prefer.

How can I add students without active OHIO IDs as a requestor?

If you are working with a user without a provisioned account in TDX, please alert the service desk through the contact center channel in Teams or call 740-593-1222 and they can quickly get the user added so you can enter the ticket. They will need to know the following:
First Name     
Last Name 
Primary Email (@ohio.edu email address, if they have one)
Alert / Notification Email – Same as above. Can be changed to a user’s personal email address if they would prefer.

The ability to add additional users has been limited to the service desk at this time to reduce the incidence of duplicate accounts.

What if the user's contact information is incorrect or the user would like to be contacted at another email or phone number?

Any additional user information can go into the description field of a ticket. The service desk also has the ability to edit the contact information and add an additional contact number if needed. The primary email will still be used by the application by default to send email notifications.

How can I make sure private comments are not emailed to the customer?

When updating a ticket within the ticketing application, first check the notifications field. If a customer is listed in the notification field, they will receive an email with the comment even if it is marked private. Once the customer is removed from the notification field, they will not receive additional emails until they are added back to the notification field. 

Private comments made through the Microsoft Teams app will not trigger notification emails.

Refer to the best practice guide for guidance on public and private comments. Public comments should be used when it would provide helpful information to the requestor, and private comments should be reserved for particularly technical troubleshooting. 

How can I see who is CC'ed on tickets submitted via email?

It is not possible to see those CC'ed on a ticket submitted via email. Additional contacts can be added as "additional people to notify" by the service desk or by customers completing the online request form.

What happens when users forward emails from TeamDynamix?

When customers forward TeamDynamix emails, those additional users are able to reply to the ticket, which will add a comment to the ticket feed. This does not automatically add the new user to the ticket for future notifications. If you receive a notification that someone not listed on the original ticket has replied, check with the original customer to see if the additional person should receive future updates. If so, users with existing accounts can be added as a contact under the People tab on the ticket. External users without TDX accounts must be added manually using the “Other Email Addresses” field in the ticket update. 

Status and Classification

Can I change the classification on a ticket (i.e. convert an incident to a service request)?

Yes, you can change the classification on a ticket. If you are in the process of creating a ticket, simply go back up to the form selection field at the top of the page and choose a ticket in the correct classification. Note that the +Choose a Ticket Form button defaults to an incident classification, but service requests are also available in the dropdown menu.

If the ticket has already been created, you must first remove the workflow prior to changing the classification. Under the Actions menu, first select Unassign Workflow, then Edit Classification. Once you edit the classification, you do not need to re-apply the workflow unless you want the ticket to route back to the service desk.

Tickets created via email will also default to incidents. The best process is being determined for the service desk to assign the correct classification and workflow.

When should I use the Resolved status, and what happens to those tickets?

If you believe you have solved the issue, set the ticket status to Resolved. Tickets with workflow applied will move to a Resolved status when the ticket is updated by choosing “Resolved” in the “Resolve Ticket” step of the workflow. If the workflow has been removed, the agent must manually update the status to Resolved. The Requestor will receive a notification and has seven calendar days to respond if they believe that the issue has not been resolved.

If workflow is in the “7 Day Wait to Change Ticket Status to Closed” step, the request will be closed after seven days, and the Requestor will have to open a new ticket if they believe the issue is not resolved.

Two boxes, one showing workflow steps and the other showing current activities as 7 day wait to change ticket status to closed

For tickets that were manually moved to a Resolved status (workflow has been removed) and have been in that status for seven days, change the ticket status to Closed. The service desk has established a process to help close any tickets that remain in a Resolved status past seven days.

The newest version of TDX includes the option to automatically close Resolved tickets after a set window of time. This update will require configuration and will be announced when available in the ticketing application.

Refer to the Ticket Status Definitions and Best Practices guide for more details

It looks like a new ticket could be started in any status. Shouldn't it always start as new?

Most tickets come in from the Technology Help Center (TDClient) will automatically have a "New" status and cannot be changed by the customer. We cannot "lock" the status in TDNext for agents, but it will still default to "New" and should not be changed unless circumstances require it. There are also a few automation rules that will be applied and may change the status on some tickets.

Have the guidelines for determining the Urgency of an incident changed?

No. They are still based on the current version (at release time) of the ITIL priority matrix.

How can I set the due date for a ticket?

A due date will appear if a task is added to a ticket. A due date attribute is not included on the standard forms, however. If it is a business requirement, please submit a service request using the (Ticketing Portal) TeamDynamix/TDX form.

Workflow

When should tickets with no customer response be resolved?

When tickets remain in the “Waiting for Customer” status with no response from the customer for more than five days, they should be moved to “Resolved.” Please add a comment alerting the customer of the change in status due to no response and that they still have another seven days to respond before a new ticket would need to be created.

If workflow is applied and in the “7 Day Wait to Change Ticket Status to Closed” step, the ticket will then move from Resolved to Closed automatically after seven days. You can verify that the workflow is in effect if this field is visible under the General tab:

A box showing workflow steps for a ticket

If the workflow has been removed, the primary assignee must manually Resolve the ticket, and then Close the ticket seven days later. 

What should I do if a ticket remains in Resolved for longer than seven days?

If a ticket remains in Resolved longer than seven days, this likely means that the workflow has been removed. If you are assigned a ticket that has been Resolved for at least seven days, move the ticket to Closed. 

The newest version of TDX includes the option to automatically close Resolved tickets after a set window of time. This update will require configuration and will be announced when available in the ticketing application. 

How can I tell if a workflow has been removed?

Tickets with an active workflow will have this field visible under the General tab:

A box showing workflow steps for a ticket

The ticket feed will also indicate all changes to workflow, including if the workflow was removed: 

A private TDX comment indicating that workflow has been removed
When should I remove the workflow from a ticket?

Workflows are designed to be a guide to route tickets to the correct teams. If they are a hindrance rather than a help, they may be removed. Removing a workflow is particularly useful for internal or misclassified tickets.

To change a ticket classification, the workflow must be removed initially, and once you select the correct form, you may want to remove the workflow from the new form as well, unless you want it to go back to the service desk.

For internal tickets where you already know the correct assignee, you may remove the workflow and alert the assigned team about the ticket. 

Please note that tickets without workflow will not automatically move from resolved to closed after seven days. The service desk runs a report to catch tickets that need to be manually updated, however the primary assignee should take responsibility to manually close the ticket. 

How can I tell when a workflow has been manually assigned?

Changes to the workflow will appear in the ticket feed. When a workflow has been manually assigned, it will appear as an update under an agent's name and read "Assigned the [name of workflow] to this incident." When the system has assigned the workflow, the update will be posted by the System and read "Changed Workflow from " " to [name of workflow]."

How do I know who to list as the responsible person or group on a ticket?

Help text will be included on each form that lists the most typical escalation path. If you do not know the responsible person or group, you may assign the ticket to the Service Desk.

Can you add more than one assignee for a ticket?

TeamDynamix does not allow multiple assignees on a ticket, but you can add additional people to notify during ticket creation, or under the people tab once the ticket is created.

How will tickets generated by web forms be handled in TeamDynamix?

The tickets generated by users on help.ohio.edu will be routed through the Service Desk, who will apply workflow if needed. The web form does not currently have any workflows connected to it.

Does TeamDynamix allow you to tie multiple tickets to a single incident?

At this time, you cannot set up parent/child relationships for tickets. TeamDynamix only allows problem, change, and release tickets to serve as parent tickets with incidents as child tickets, indicating the same root cause. The ability to create parent/child relationships will be available when problem management is implemented. 

How do I move tickets to another ticketing application, such as HCOM?

This capability is limited to the Service Desk. Please route the ticket to the Service Desk and request that they send it to the appropriate ticketing application. As of the initial launch, HCOM is the only other separate ticketing application in TeamDynamix.


Service Desk employees can route to another application by selecting “Move to Application” under the Actions button:
 

Shows the Action button menu options in TeamDynamix, with "Move to Application" highlighted

Can I change the reviewer on a ticket?

You cannot change the reviewer of a ticket. First check to make sure the correct form was used for the ticket. If the form is correct but the reviewer in the workflow is incorrect, please submit a (Ticketing Portal) TeamDynamix/TDX service request to update the reviewer.

Troubleshooting

What should I do if a ticket is misrouted?

If a ticket has been misrouted, click the Edit button and select Yes under the Misrouted dropdown. Include a note explaining how it was misrouted in the second field that appears. Change the assignee to the person or group it should be routed to, or the service desk if you are not sure. If the workflow is incorrect, remove the workflow under the Actions menu. If the workflow needs to be improved for future tickets, submit a (Ticketing Portal) TeamDynamix incident so the TD Admin team can update it. Check the best practice guide for more details.

The ticket browser window prevents me from seeing the entire ticket. How can I fix this?

Window sizing issues appear to be more common on large monitor screens. We are unable to set the pop-up window attributes, but you can enlarge them on a PC by clicking the windows key plus the up arrow key while the ticket is open.

Why didn't my resolved ticket close automatically?

Tickets without workflow will not automatically move from Resolved to Closed after seven days. The primary assignee must manually close the ticket after seven days. The service desk will also run a report periodically to catch tickets that need to be manually closed.

All tickets with workflow applied will have this field visible under the general tab:

A box showing workflow steps for a ticket


When a workflow is removed, it will also be indicated in the ticket feed:

A private TDX comment indicating that workflow has been removed

The newest version of TDX includes the option to automatically close Resolved tickets after a set window of time. This update will require configuration and will be announced when available in the ticketing application.

Project Implementation

When will the service level agreements be added?

SLA incorporation is planned to be added very soon.

How will the Technology Help Center evolve over time?

The Technology Help Center launched to campus users on July 26, 2021 with a single online request form to generate a ticket. Campus users can still contact the service desk via email, phone, chat, or in-person help.

Once the service catalog and knowledge management modules are implemented, those elements will be added to the Technology Help Center and will be searchable by users. Customized forms will be introduced with accompanying help documentation so a user can submit a ticket if the available information does not resolve their issue.

How long will Footprints 12 be available?

Footprints 12 tickets will be available in view-only status after July 26, 2021. The FP 12 contract will be renewed through August 2022, and an archive solution based on retention rules will be determined before that time.

Will we be using all of the features covered in the training videos?

No, not all features from the videos are part of our implementation. For example, we do not have a Bomgar integration so Generate Bomgar session will not appear. No determinations have been made about using the project management module, so Convert to Project and Convert to Project Request are also not available at this time. Other options only appear for certain classifications of tickets or if they are assigned to you or a group you are a member of, some may appear on some tickets and not others.